Bunnymator, or impractical computer vision
This is a story of an old toy webpage that used to entertain kids with hand-drawn animated doodles.
Disclaimer: I’m not a computer vision expert, so many of the mistakes might be obvious to the reader, but nevertheless are part of my story.
I vaguely remember that in the early days of smartphones there was an app that allowed you to print a grid of squares. Then you scribbled some hand-drawn animated frames in each cell. Then you took a photo and got a nice wobbly cartoon. Just like the flip-book animations we did on the notebook margins at school. Stick people with their crazy lives full of running, playing football and occasionally fighting.
I tried to find the app (not too zealously, because building one myself would be more fun, anyway). Some apps required a special template with QR codes or Aruco markers to locate the grid and the cells. I wanted to go with just a blank paper and a pen. Grid to be drawn with a ruler, to not spoil the kids (and of course some backup grids were printed – after all, it’s art, not draughtsmanship).
My first version took me one evening and a hundred lines of code. It was pre-AI, so it had to be very simple.
Computer vision
I took a few drawings of some “validation” grids. To locate a grid we don’t need to know much about colours, so I converted pictures to grayscale. Then I took OpenCV, since grayskull didn’t exist yet.
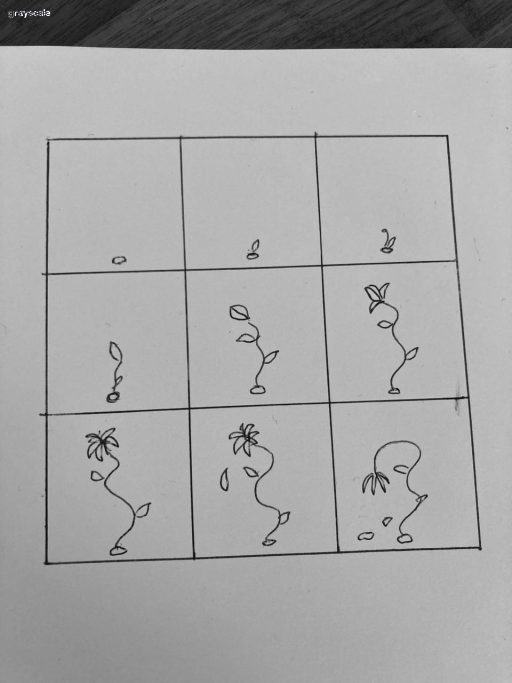
Since the camera quality on low-end children phones is usually terrible and environmental light is uneven - to binarise the image (turn from grayscale to pure black-and-white) I used adaptive thresholds. As you probably know, it’s when you slide a small window over the image and for each position you check the surroundings of the center pixel. If a pixel is darker than the weighted sum (or mean value) of the surroundings - it’s black, otherwise white.
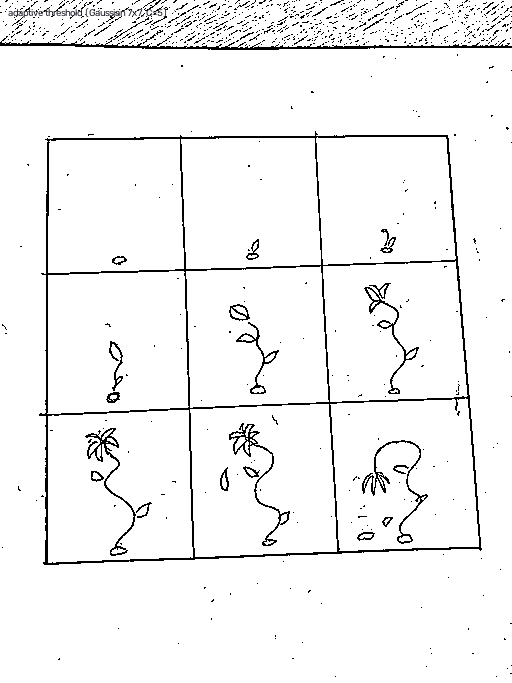
Now having a binary image we can try to locate a grid in it.
My intuition was admittedly naïve - I was looking for all the contours (consecutive lines of black pixels), simplified them hoping to get something like rectangles. Then in the hierarchy of nested rectangles I tried to find the smallest one that contained at least 4 other rectangles of similar size (who would draw a cartoon of less than 4 frames?).
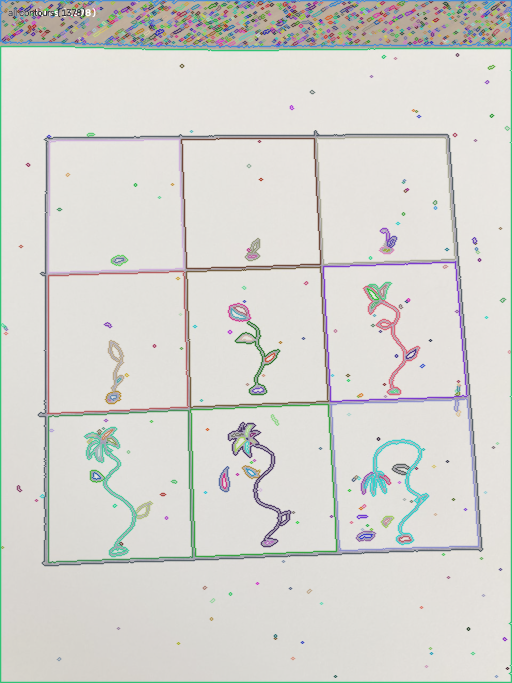
Yes, there are lots of contours - every line and every dot becomes a contour of its own. We can filter them by size (both, total contour length and approximate area of a contour). Now, we are cooking (highlighted squares are bounding boxes, not contours themselves):
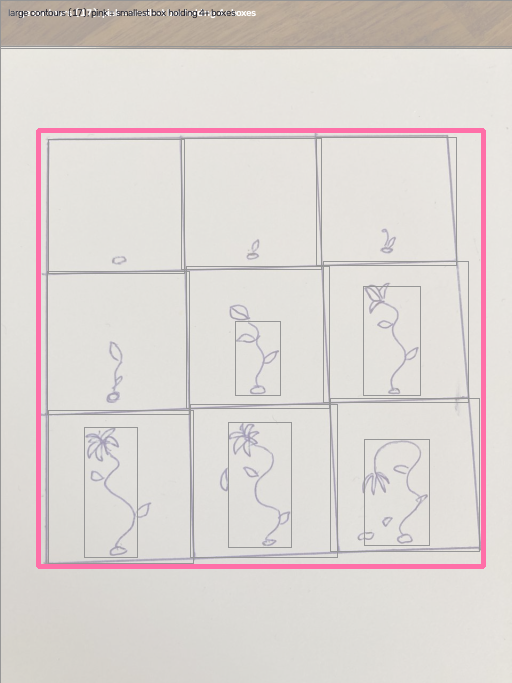
Looks like a grid, but we need to unwarp it, because it’s slightly rotated and scewed. This can be done if we locate the corners of a contour. First we build a convex hull and try to simplify it to get straight lines using Douglas-Peucker algorithm, which is only a few lines of recursion. If we are lucky to get exactly four lines - their ends are the corners, otherwise I tried to fall back to the bounding box, hoping that the kids would hold their phone strictly vertically while taking a photo. In most cases, however, Douglas-Peuker worked perfectly.
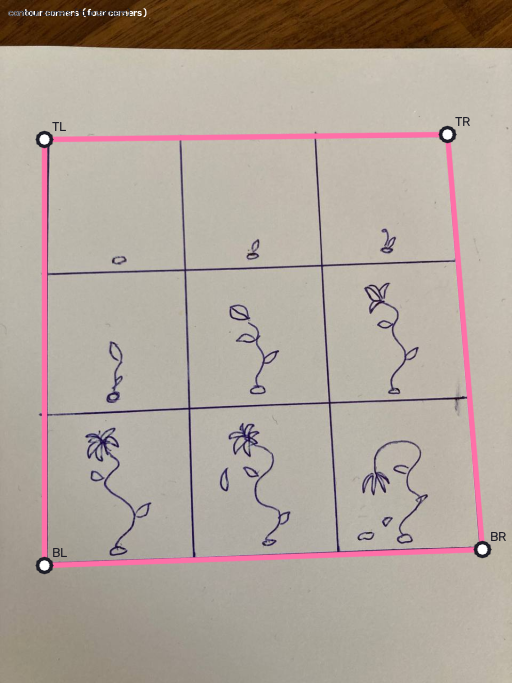
Unwarping is a bit more complex in terms of arithmetics. This normally involves a 3x3 transformation matrix, and the values are set in such a way, that by multiplying the matrix to a vector of source image coordinates you would get destination image coordinates, so we can copy every pixel into the right place.
Fortunately, OpenCV came with helpful getPerspectiveTransform and warpPerspective that would only operate on an array of source and destination corner coordinates (8 elements each). Working as expected (mostly):
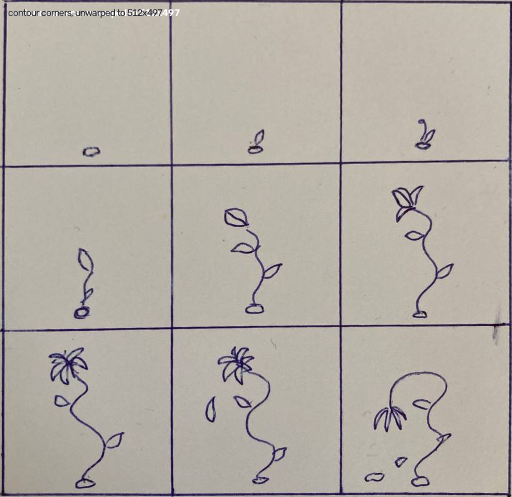
Now we need to extract each frame and pack them into an animated GIF. This is where I got silly, and simply cut the image into a regular grid knowing the number of frames/cells in each row and column from the previous contour detection phase. It worked well on a fine, regular grid, but try making a kid to draw a regular grid with a ruler.
At this point the project was already actively used by the only few household artists, so I stopped the engineering and entered the artistic phase of it.
Enters AI
Having a knowingly buggy product bothered me, even if everyone lost their interest to it at the end. So I thought, why don’t I use something more convoluted, like YOLO. If anyone missed it, it’s a tiny model that takes an RGBA image as an input and tells “there is an object __ at position __, with confidence __”. There is also one peculiar variant of YOLO, trained specifically to detect human poses, i.e. arms, legs, eyes etc. Instead of a position (or bounding rect) it returns exact coordinates of body parts (keypoints).
Surely, a model like that would be capable of detecting grids? I’d have to fine-tune it though.
Thankfully, synthesizing a training dataset for such a simple task isn’t that hard. Given a few photos of paper and few scribbles and doodles, the script was combining them in various pre-programmed combinations into a grid (from 2x2 to larger ones like 6x6). Applying the same warp transforms backwards allowed me to render grids on paper in various positions. Adding some noise, some shadows, and some very faded text (as if it’s printed on the back side of the paper) made it look very realistic:
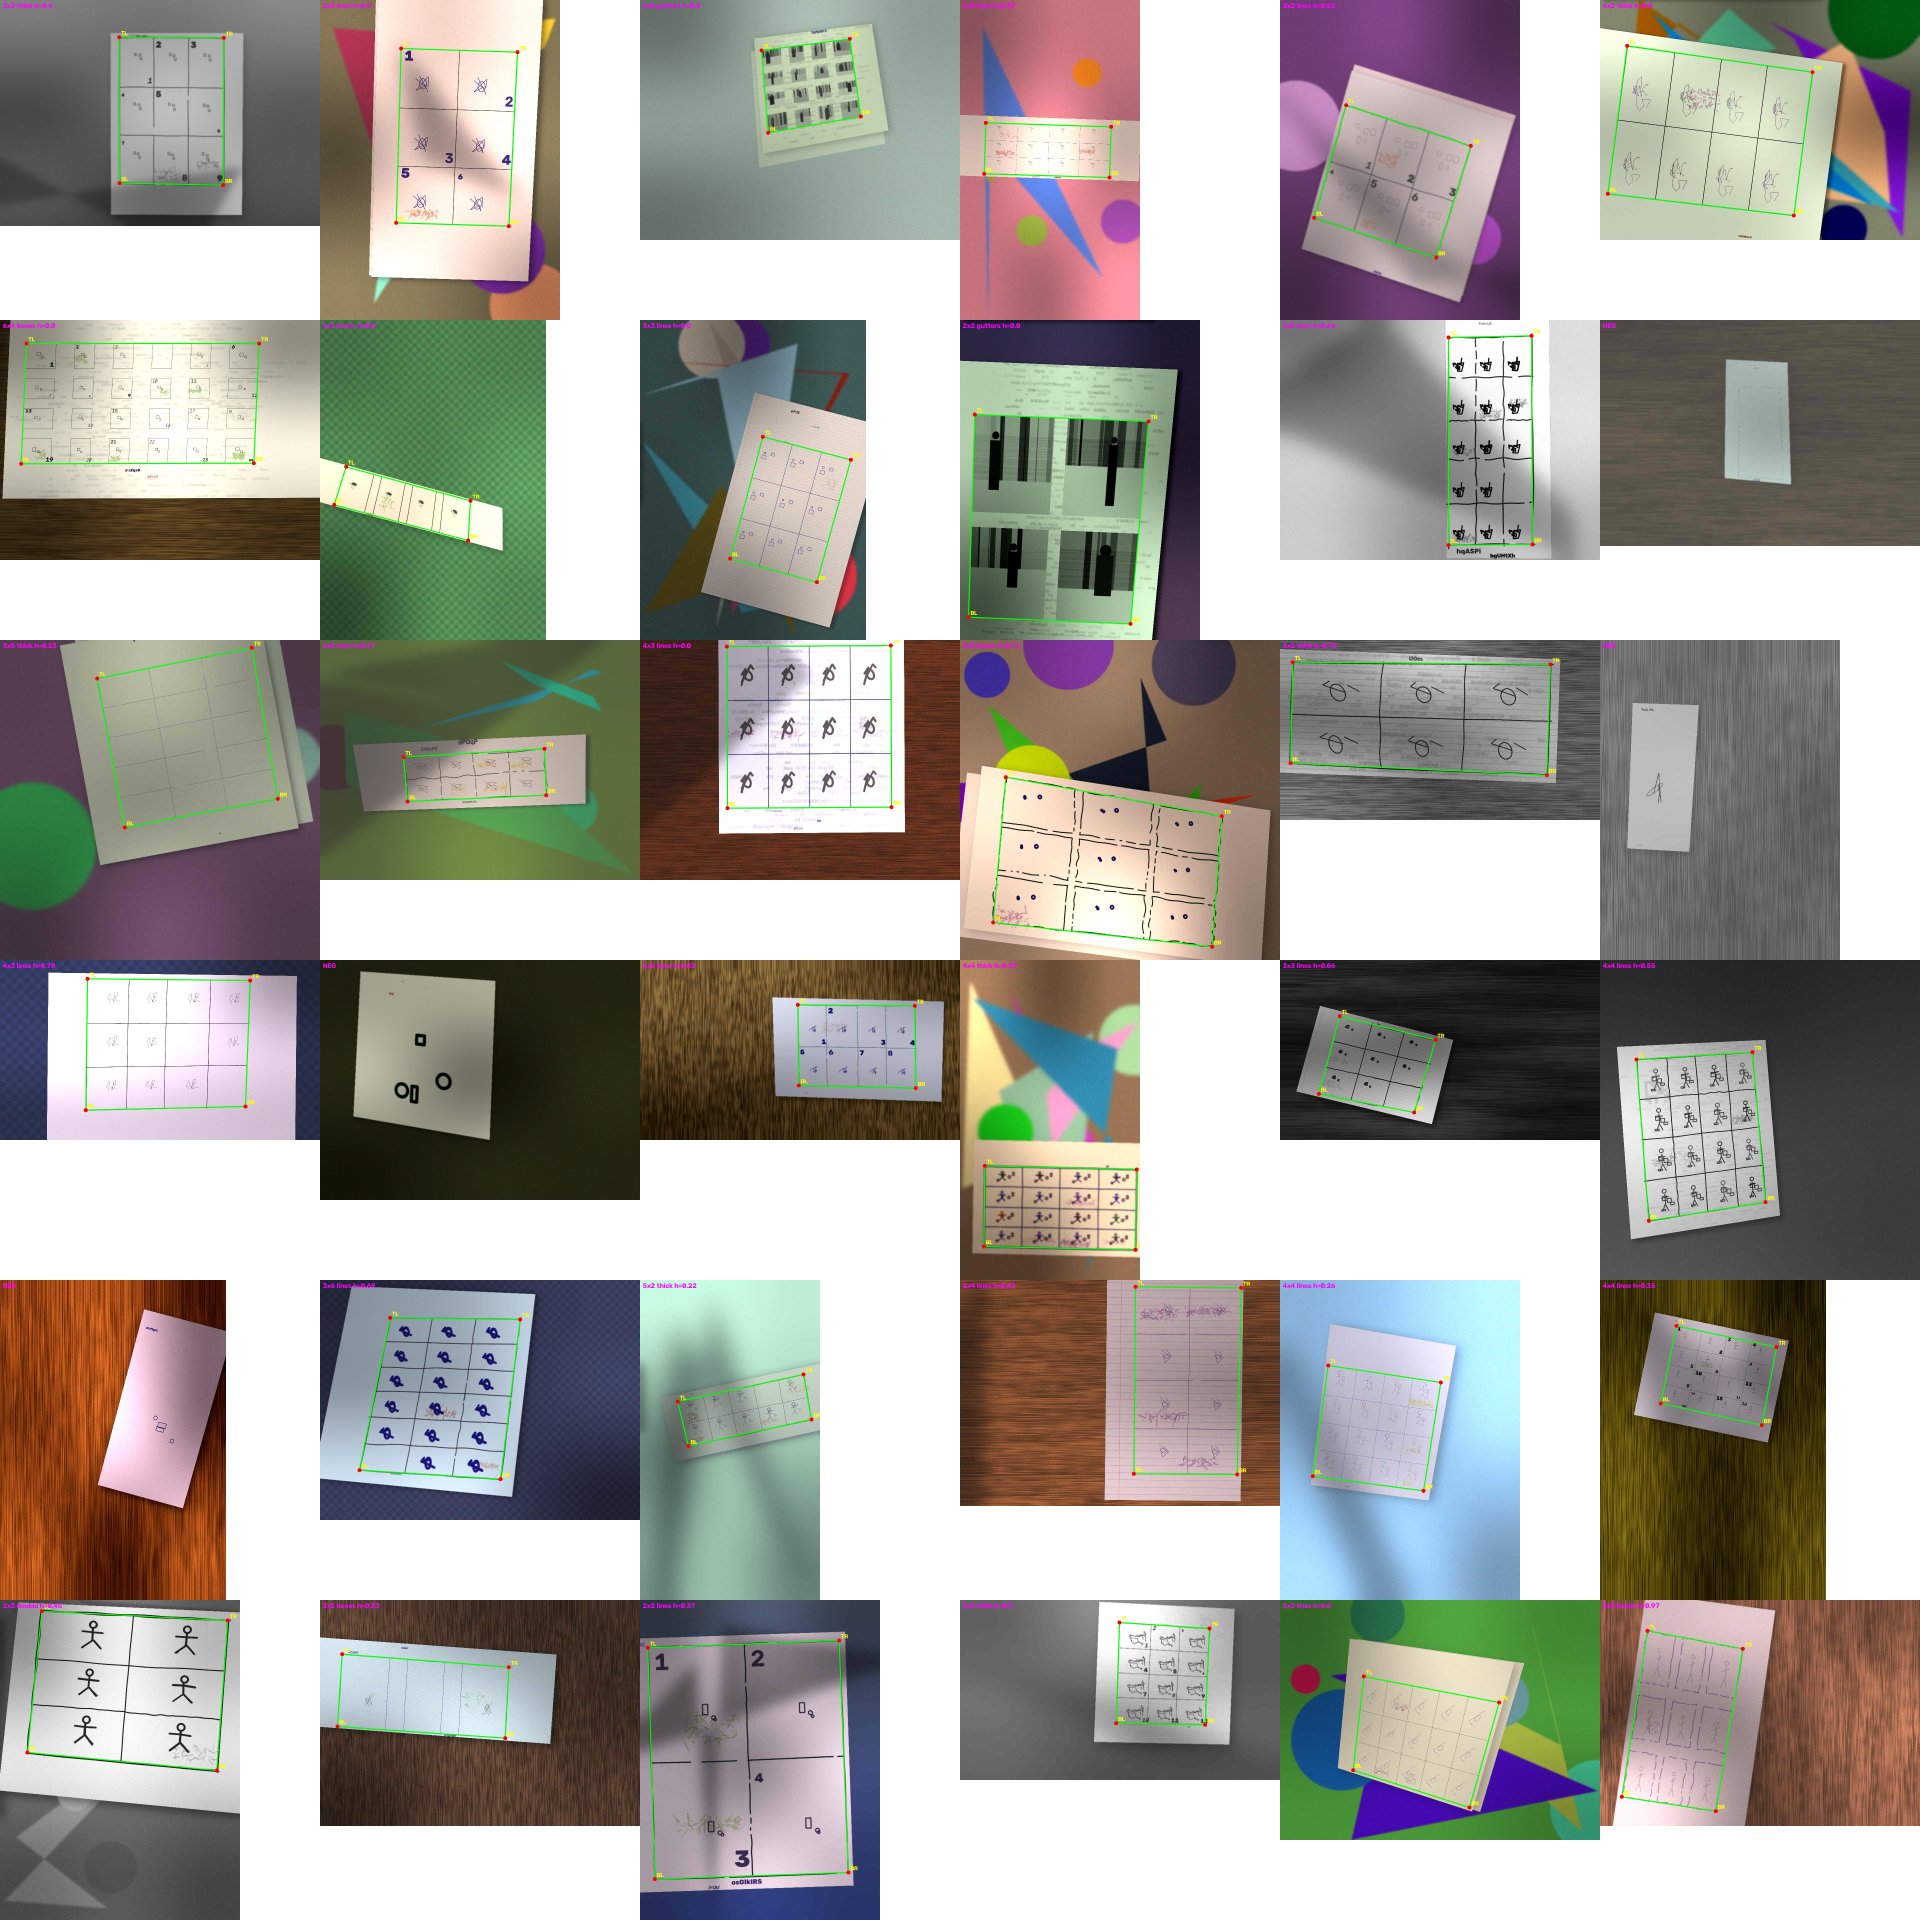
After 6000 images were rendered (and 10% kept off for validation), I let it run for a few epochs. I also included some false positives, like doodles without a grid, or empty pages. After 10 epochs it was at 94% accuracy, and after 40 epochs it reached 99.5%. After long three hours the model was trained. On a small demo with a webcam it was very stable in detecting grids at ~20FPS using ONNX runtime.
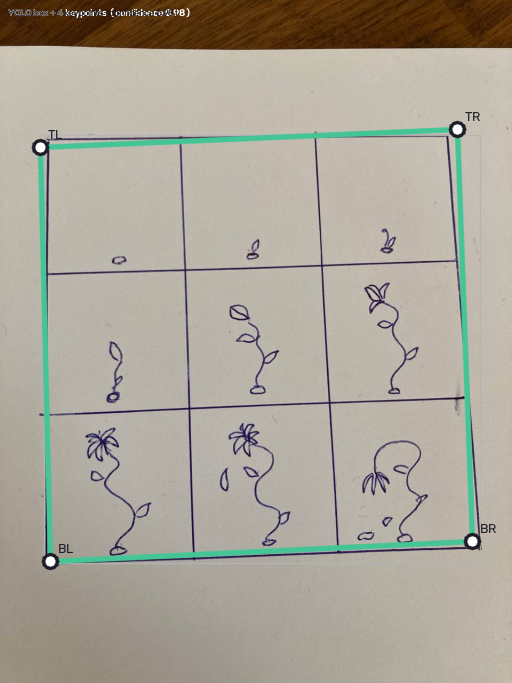
Of course, it didn’t solve the problem with detecting each frame, because I didn’t include that into the dataset originally. Here go my other three hours of waiting.
But I’ve heard that almost every computer vision task is likely to be solved without neural networks. Since the grids are mostly regular, after unwarping we’re likely to see solid vertical and horisontal lines. We only need to detect their coordinates.
For vertical lines I “thicken” the black pixels by 7px sideways, to forgive slightly wobbly lines. Then I open them vertically so only strong, continuous vertical lines survive from the original image.
It was tempting to simply count the average of black pixels in each column, but since some drawing might contain long vertical lines as part of the drawing it wouldn’t work. So we split the image into smaller areas, ~10 of them, count percentage of black pixels in each “band” and get the 10th percentile from such a histogram. This results in proper grid lines to be detected, while vertical lines that are part of the image and don’t touch the sides of the frame would be skipped. Same for horisontal lines.
Now we can cut and slice our grid of animated frames into a lovely GIF:

Back to primitive CV
And yet, I wasn’t happy. Stuck between a lion and a crocodile (OpenCV is ~9MB, YOLO+ONNX is ~12MB, over 3MB if quantised) - initial page load was still too slow. But do I need full OpenCV? Looking back, there is only a handful of primitives, of which contour detection is probably the hardest. But I’ve done it already in grayskull, so porting it to JavaScript shouldn’t be too hard.
Grayscale? Sum up R, G, and B components:
function toGray(img) {
    if (img.gray) return img.data;
    const { data } = img, out = new Uint8Array(img.width * img.height);
    for (let i = 0, j = 0; i < out.length; i++, j += 4) out[i] = (data[j] * 77 + data[j + 1] * 150 + data[j + 2] * 29) >> 8;
    return out;
}
Adaptive threshold? Use Gaussian kernel and a sliding window (could be shorter since the block size is fixed):
function gaussianKernel(size) {
    const sigma = 0.3 * ((size - 1) * 0.5 - 1) + 0.8; // from OpenCV
    const k = new Float32Array(size), r = size >> 1;
    let sum = 0;
    for (let i = 0; i < size; i++) sum += k[i] = Math.exp(-((i - r) ** 2) / (2 * sigma * sigma));
    for (let i = 0; i < size; i++) k[i] /= sum;
    return k;
}

function adaptiveThreshold(gray, W, H, block, C) {
    const k = gaussianKernel(block), r = block >> 1;
    const tmp = new Float32Array(W * H), acc = new Float32Array(W), pad = new Float32Array(W + 2 * r);
    for (let y = 0; y < H; y++) { // horizontal
        const row = y * W;
        for (let x = 0; x < W; x++) pad[x + r] = gray[row + x];
        for (let i = 0; i < r; i++) { pad[i] = gray[row]; pad[W + r + i] = gray[row + W - 1]; }
        acc.fill(0);
        for (let t = 0; t < block; t++) {
            const kt = k[t];
            for (let x = 0; x < W; x++) acc[x] += kt * pad[x + t];
        }
        tmp.set(acc, row);
    }
    const out = new Uint8Array(W * H);
    for (let y = 0; y < H; y++) { // vertical
        acc.fill(0);
        for (let t = 0; t < block; t++) {
            const ry = Math.min(Math.max(y + t - r, 0), H - 1) * W, kt = k[t];
            for (let x = 0; x < W; x++) acc[x] += kt * tmp[ry + x];
        }
        const row = y * W;
        for (let x = 0; x < W; x++) out[row + x] = gray[row + x] > Math.round(acc[x]) - C ? 1 : 0;
    }
    return out;
}
Convex hull? Use Andrew’s monotone chain - code is there, too.
Calculating perimeter is a one-liner:
const perimeter = poly => poly.reduce((s, p, i) => s + Math.hypot(p[0] - poly[(i + 1) % poly.length][0], p[1] - poly[(i + 1) % poly.length][1]), 0);
Douglas-Peucker line simplification, as promised, is very small too:
function simplify(pts, eps) {
    if (pts.length < 3) return pts;
    const [a, b] = [pts[0], pts.at(-1)];
    const dx = b[0] - a[0], dy = b[1] - a[1], len = Math.hypot(dx, dy) || 1;
    let far = 0, at = 0;
    for (let i = 1; i < pts.length - 1; i++) {
        const d = Math.abs(dy * (pts[i][0] - a[0]) - dx * (pts[i][1] - a[1])) / len;
        if (d > far) { far = d; at = i; }
    }
    if (far <= eps) return [a, b];
    return simplify(pts.slice(0, at + 1), eps).slice(0, -1).concat(simplify(pts.slice(at), eps));
}
What’s missing is contour detection. From Grayskull I recall that contour tracing was built on top of the blob detection, unlike OpenCV that uses line-following algorithm instead. Blob detection is a quick union-merge algorithm as described in the previous post. So I ported that, and instead of hull of a contour I was looking for a hull of a region.
Quick benchmarks shown my suboptimal implementations are ~6x slower then OpenCV+WebAssembly, but still faster than YOLO.
As I result, I got a tiny web page (a custom web font is larger than the actual JS code). And it does exactly what it did years ago. Progress?
If anyone wants to give it a try - https://bunny.zserge.com - it’s frontend-only, local, none of your creative experiments would ever reach the server.
Happy doodling!
I hope you’ve enjoyed this article. You can follow – and contribute to – on Github, Mastodon, Twitter or subscribe via rss.
Oct 01, 2026
See also: AI or ain't: Neural Networks and more.
